Understanding Our built-in text messages
Our webinar software comes with a robust text messaging system that allows you to send text messages to your registrants and attendees based on a variety of different events. These text messages can be easily customized to include any text and links that you may want to add.
As a basic example, our webinar software can send webinar or meeting registrants a text message reminder shortly before the scheduled event start time. This is a great way to boost show up rates for your webinar or meeting.
Please note that in order to receive text messages, the registrant must have entered a valid phone number during the registration process.
In order to use our built-in text messaging system, your account must have text message credits added to it. Each text message sent with our built-in system costs 1 text message credit.
To add more text message credits to your account, go to your settings page and scroll down to the "Text Message Credits" section.
There, you will be prompted to "Add a payment method". Once you have a payment method added, text message credits can be added to your account in two ways.
Method 1: Automatic refills
Our webinar software recommends setting up automatic refills so that you never need to manually add more credits or keep track of how many credits your account has left. This ensures that all your registrants and attendees will continue to get text messages and that your text message credit balance never falls to 0.
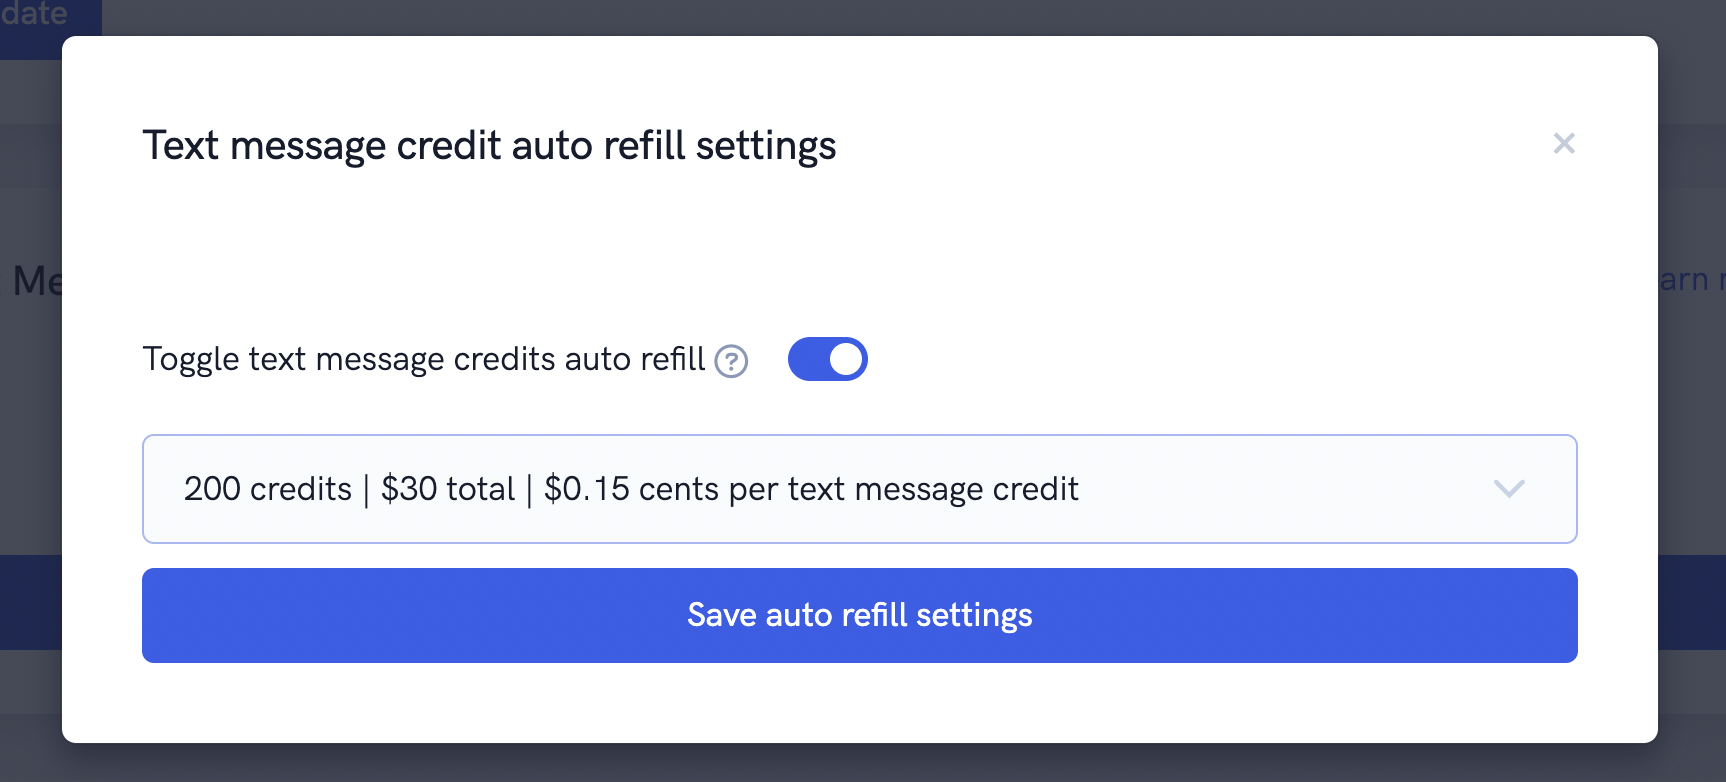
In order to set up automatic refills (assuming you have already added a payment method), click the "Edit auto refill settings" button in the "Text Message Credits" section of your settings page. On the pop-up that appears, click the toggle switch to enable or disable the auto refill feature.
If enabled, when your text message credits balance falls below 10, your account will automatically be refilled to the desired amount. You can specify the amount of credits to refill your account with from the drop down list.
Once you have enabled auto refill and specified the desired refill amount, be sure to click the "Save auto refill settings" button.
And that's it! Now whenever your account falls below 10 text message credits, more credits will be added to your account automatically using the payment method on file.
Method 2: Add credits manually
You can also manually add credits to your account whenever you want. Simply click the "Add more credits now" button in the "Text Message Credits" section of your settings page.
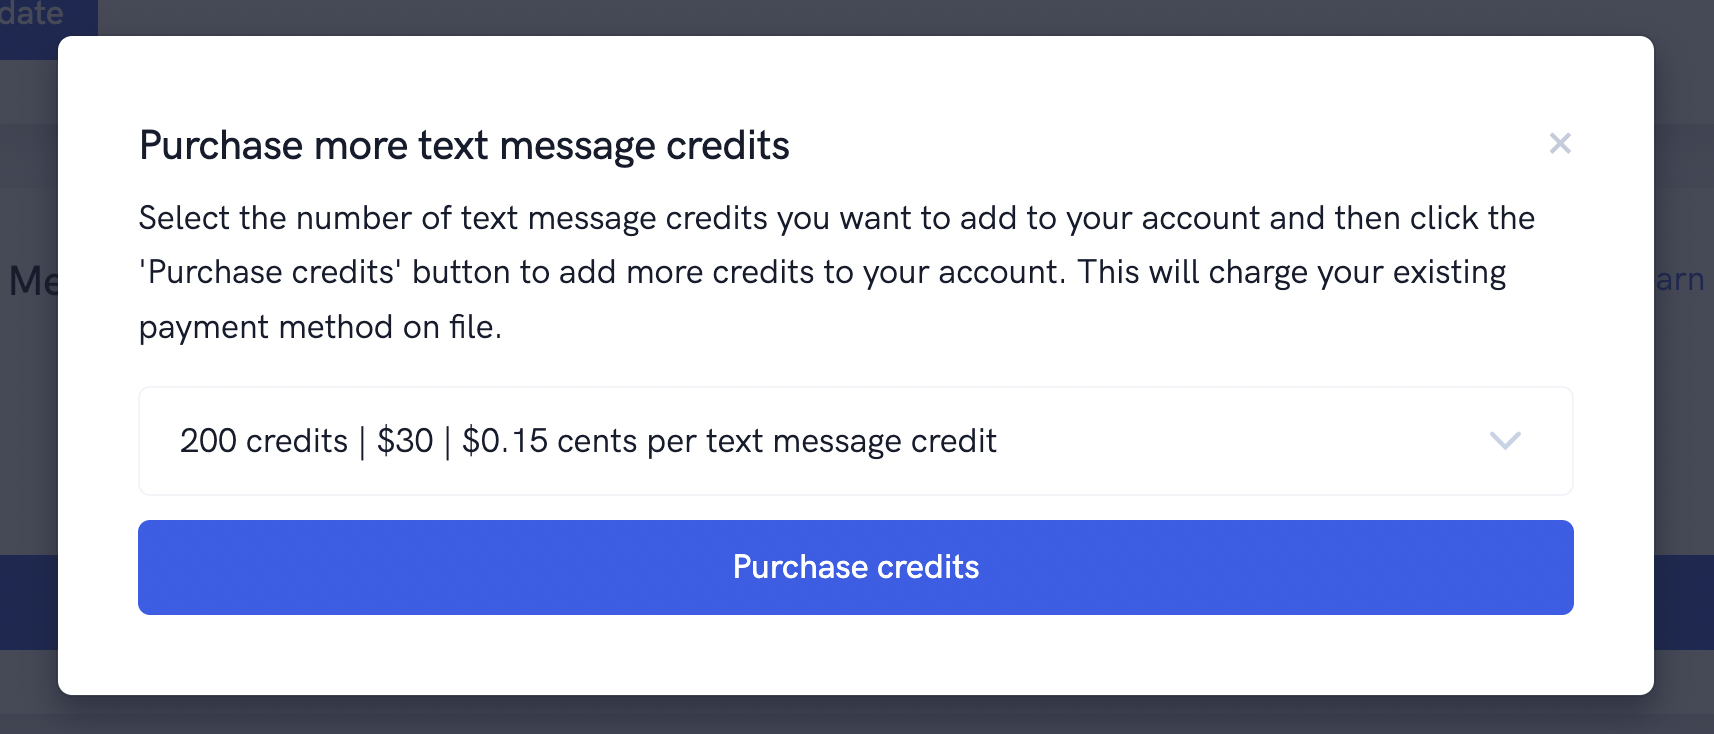
On the pop-up that appears, select the desired amount of credits you want to add to your account from the dropdown list and then click the "Purchase Credits" button.
And that's it, you've manually added text message credits to your account!
Sending text messages to registrants and attendees
Once your account has text message credits, you can set up your webinars and meetings to automatically send text messages to your liking.
In order to customize your text message settings, open up the webinar or meeting you want to customize from the dashboard area, and then head over to the "Other" settings page. On this page you can quickly enable or disable the various types of text messages that you want to send to registrants and attendees.
Below, you'll see an example of enabling confirmation text messages and the default message that gets sent.
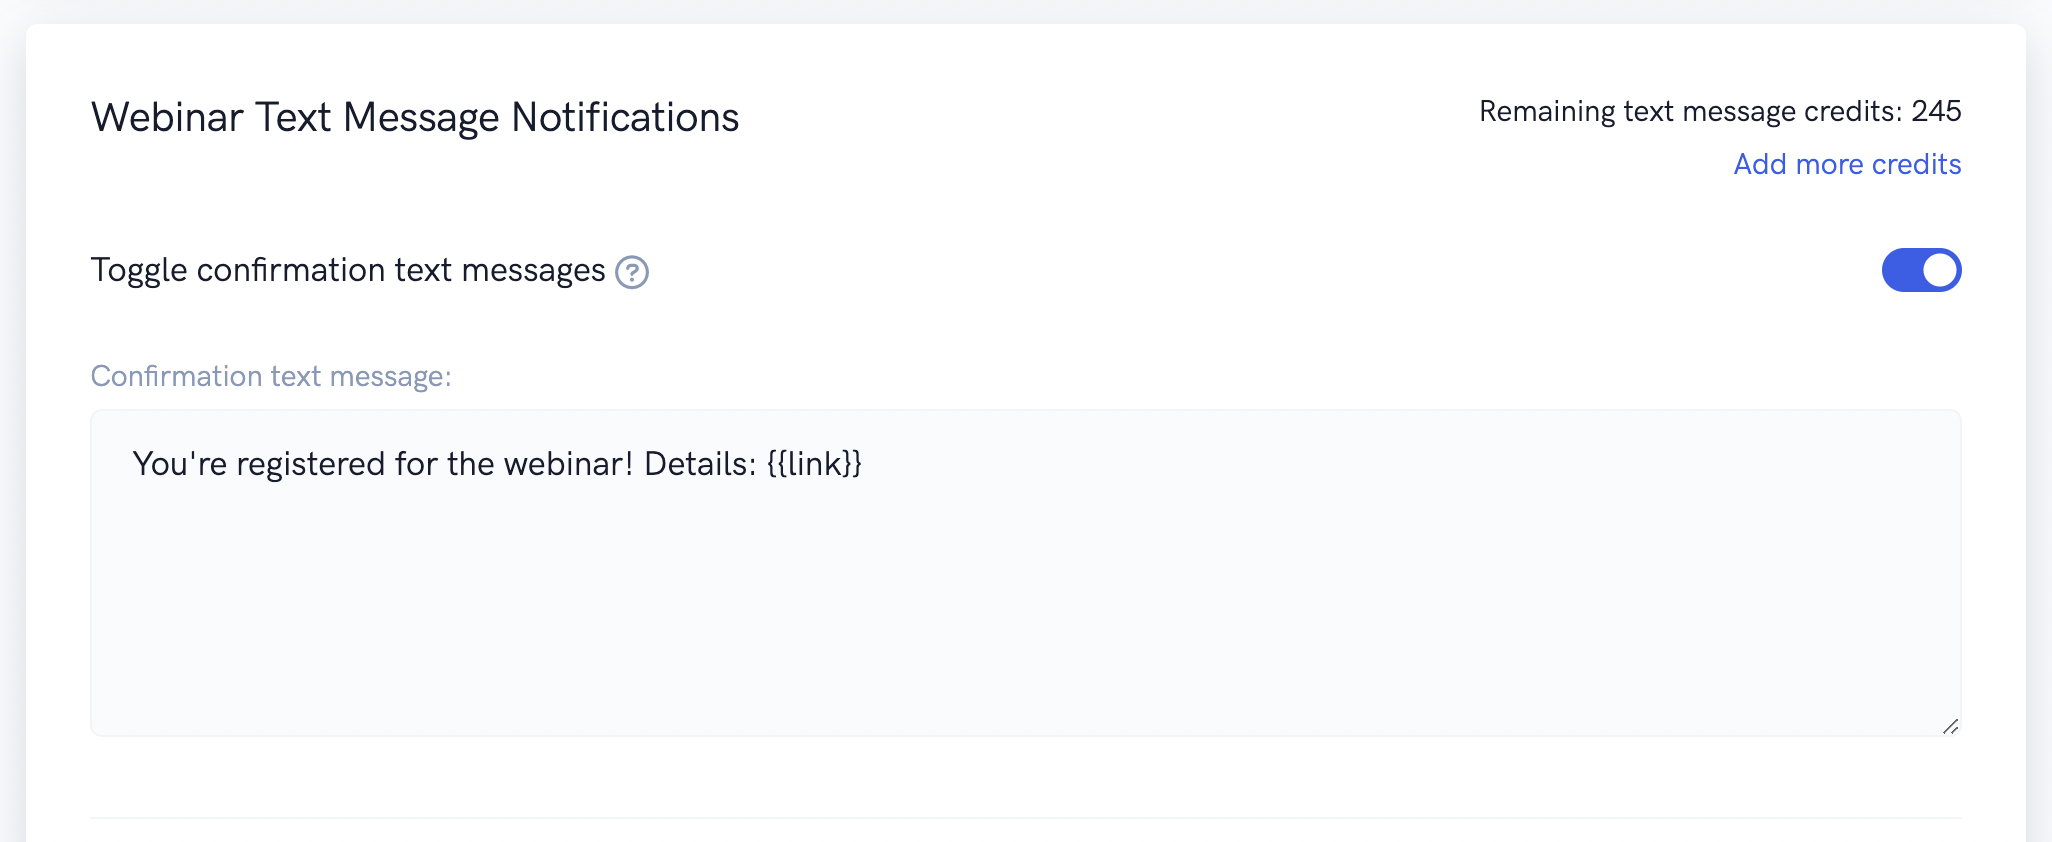
Once you've enabled a text message notification for your webinar, you're all set! Registrants and attendees will receive the text messages that you specified (as long as they have entered in a valid phone number).
Related Articles
Understanding built-in emails
Get a quick overview of built-in emails and how to customize them. Our webinar platform comes with a robust email system that allows you to send emails to your registrants and attendees based on a variety of different events. These emails can be ...Getting started
In this tutorial, you'll learn the basics of our platform to get up and running fast! The tutorial below shows you how to get up and running with our webinar software when you sign in for the first time. By the end of the tutorial, you'll have a good ...How to view chat message history, follow up with attendees who leave chat messages, and enable chat email notifications
In this article, we'll show you the ins and outs of our powerful live chat features! Thanks to our powerful chat features, it's super easy to look up an event's chat message history, get email notifications when people leave chat messages in your ...Understanding time zones
A simple time zones tutorial. All scheduled webinar dates and times will be converted to the viewer's local time zone. For example, if you schedule a webinar for 4 PM America/New_York time, a person who visits the registration page in Los Angeles ...Understanding the Webinar Duration setting
This article will help you understand the Webinar Duration setting and how it affects your webinars. The Webinar Duration setting is an important one to understand as it affects a variety of things with regards to your webinar. Each webinar inside ...