Understanding built-in emails
Our webinar platform comes with a robust email system that allows you to send emails to your registrants and attendees based on a variety of different events. These emails can be easily customized to include any text and links that you may want to add.
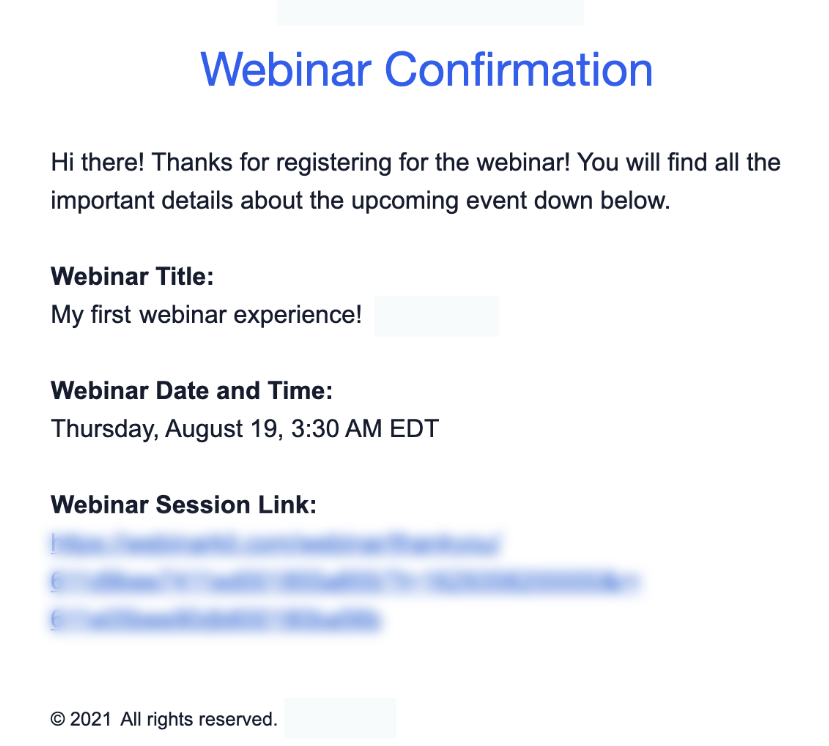
Our platform will, by default, send all registrants a confirmation email with the details of the session they registered for including the title, the time and date of their session, and their unique session link.
The screenshot below is an example of what the default confirmation email looks like.
By default, our platform sends out a confirmation email, a one day reminder email, and a 30 minute reminder email to all registrants. Below you can see some of the emails that can be sent using the built-in email system.
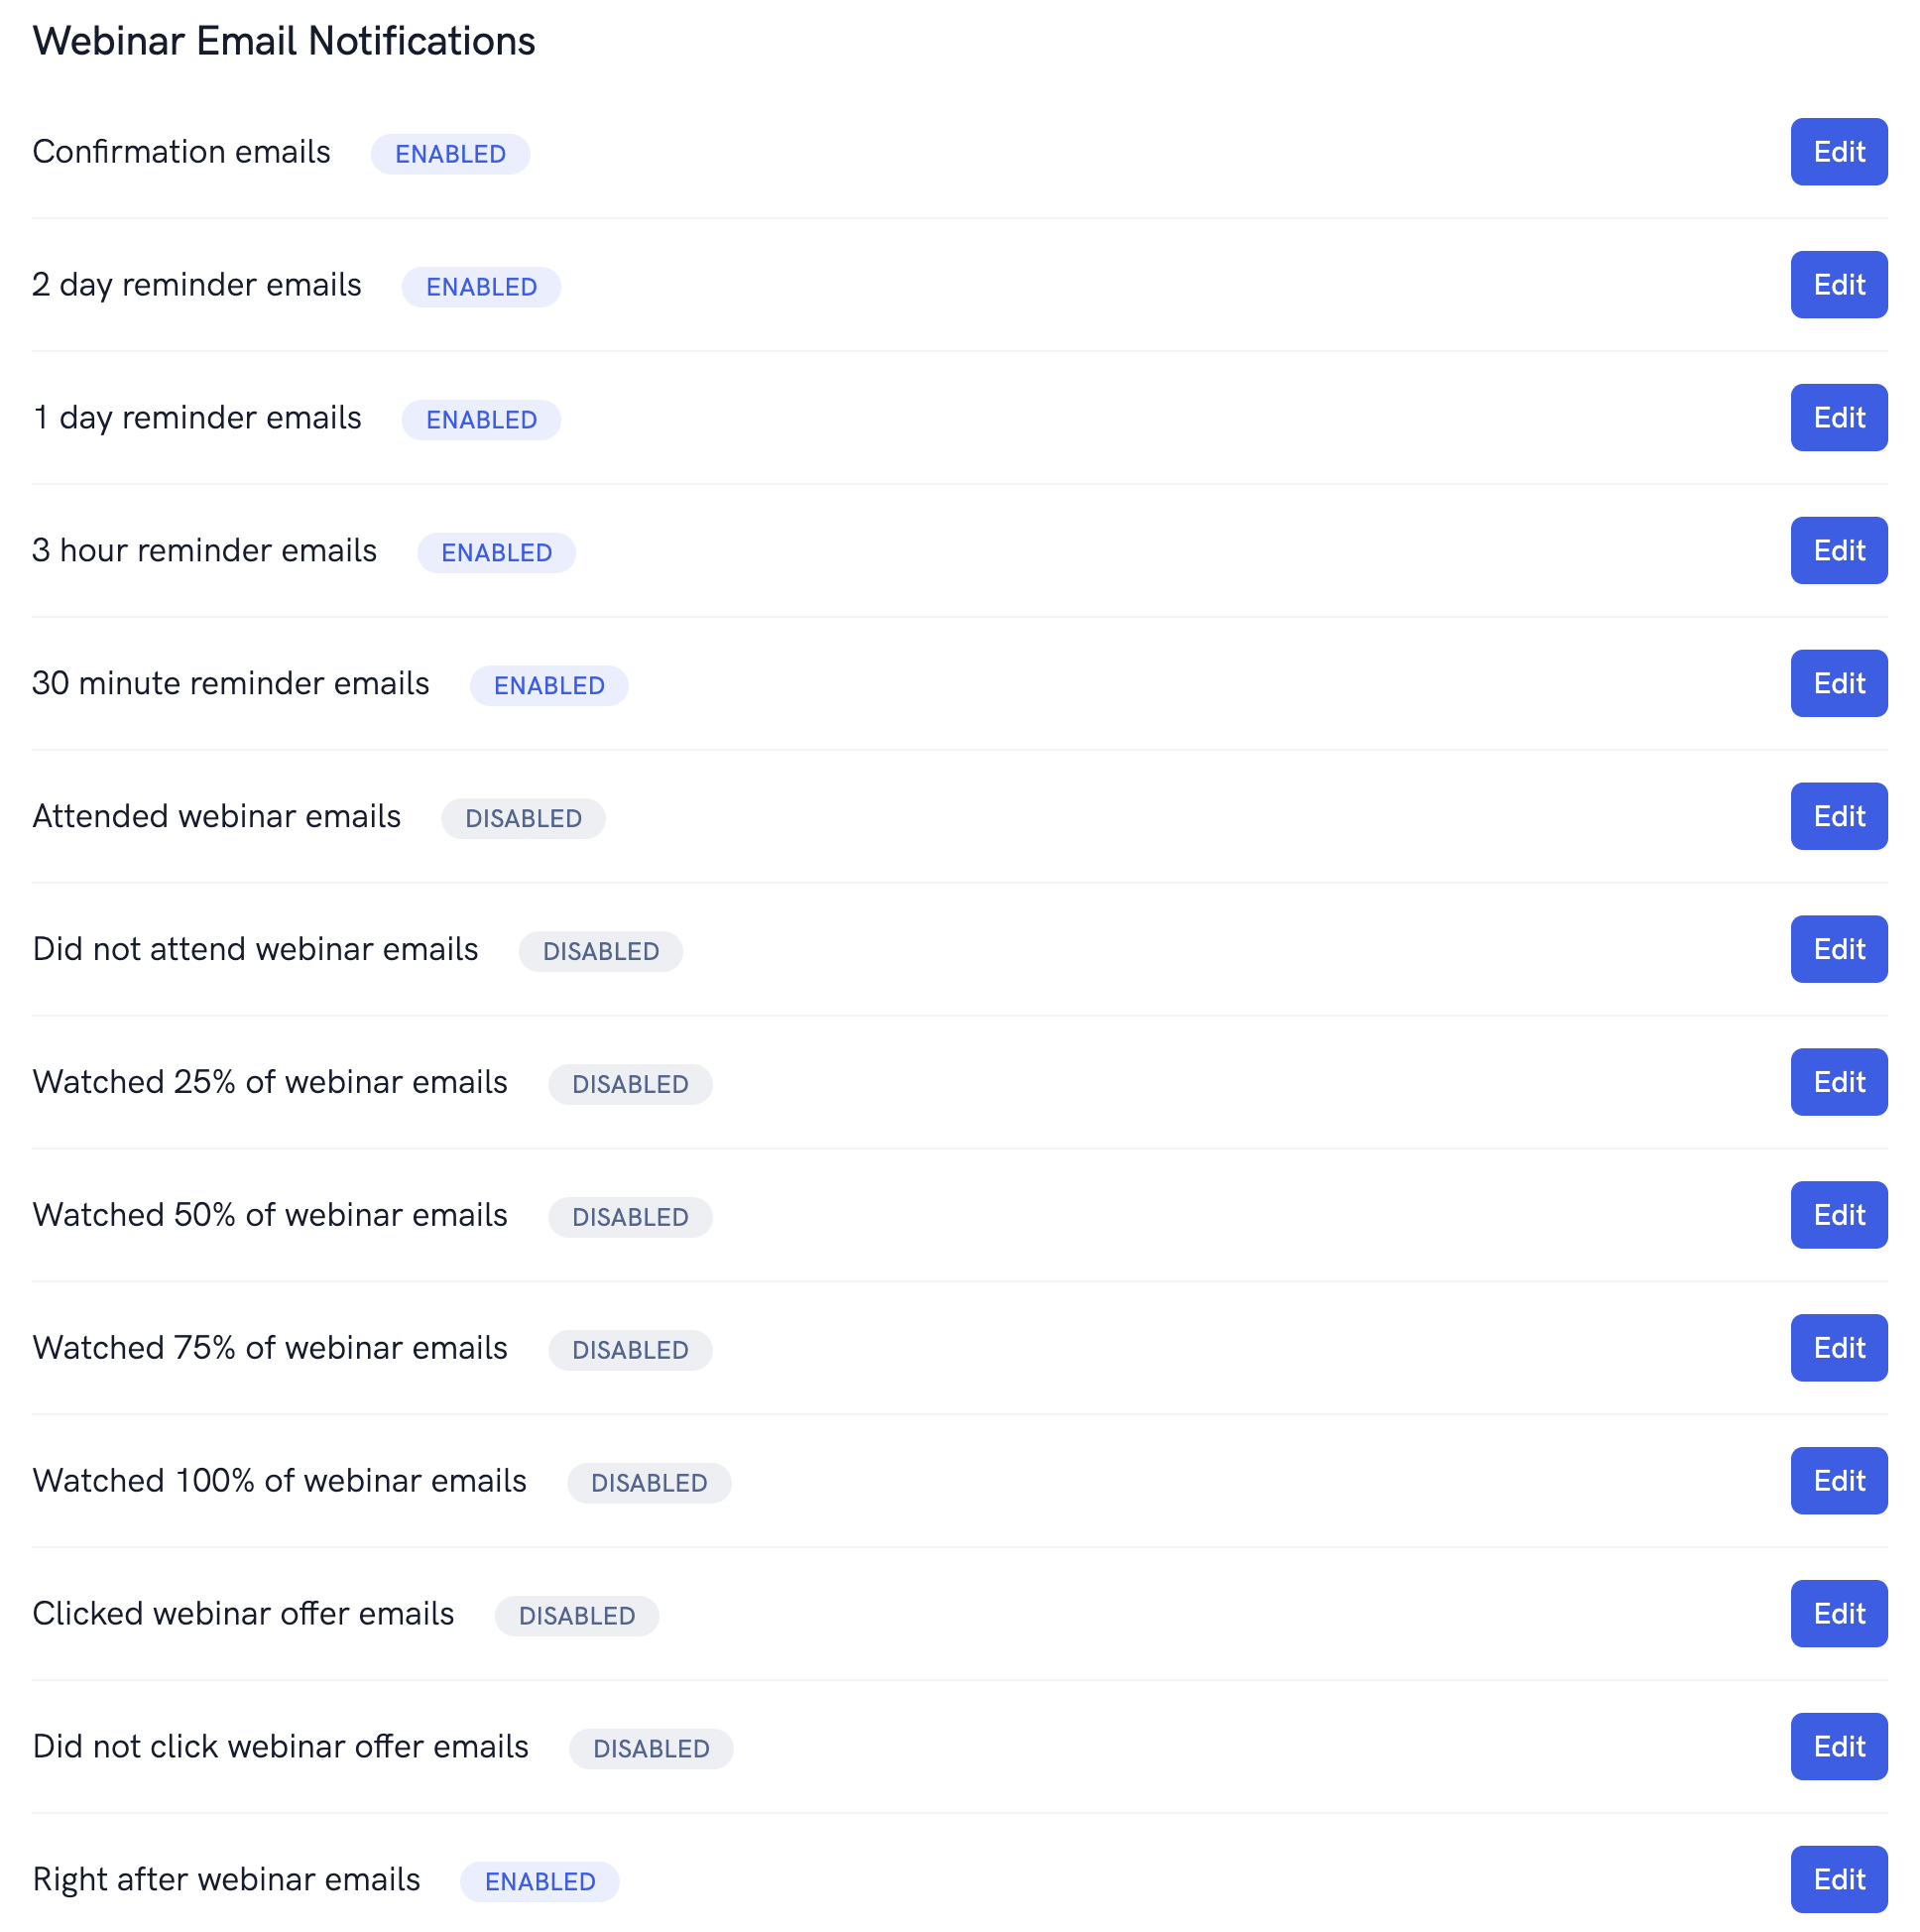
In order to customize your email settings, open up the webinar or meeting you want to modify from the dashboard area and then head over to the "Other" settings page. On this page you can quickly enable or disable the various types of emails that you want to get sent out to registrants and attendees.
Below, you'll see an example of enabling confirmation emails and the default message that gets sent.

In addition, you are now able to customize the email subject line, sender from text, and the title that displays inside the email content.
The current list of keywords and what they are replaced with is shown below:
The {{title}} keyword will be replaced with the title of the event that the registrant registered for.
The {{date}} keyword will be replaced with the time and date of the event session that the registrant registered for.
The {{link}} keyword will be replaced with the registrant's unique event link (or replay link for emails sent AFTER the event)
The {{first_name}} keyword will be replaced with the registrant's first name (if entered when someone registers for the webinar or meeting).
The {{last_name}} keyword will be replaced with the registrant's last name (if entered when someone registers for the webinar or meeting).
The {{bold}} keyword will be replaced with a <strong> tag. Use this to start a bold section of text.
The {{endbold}} keyword will be replaced with a </strong> tag. Use this to end a bold section of text.
Related Articles
Understanding Our built-in text messages
Get a quick overview of Our built-in text messages and how to customize them. Our webinar software comes with a robust text messaging system that allows you to send text messages to your registrants and attendees based on a variety of different ...Why are my emails landing in spam?
If you're using our built-in emails and having issues with them landing in spam, be sure to read this. Our built-in email system allows you to send confirmation, reminder, and follow up emails to your registrants and attendees based on wide variety ...Understanding time zones
A simple time zones tutorial. All scheduled webinar dates and times will be converted to the viewer's local time zone. For example, if you schedule a webinar for 4 PM America/New_York time, a person who visits the registration page in Los Angeles ...Understanding the Webinar Duration setting
This article will help you understand the Webinar Duration setting and how it affects your webinars. The Webinar Duration setting is an important one to understand as it affects a variety of things with regards to your webinar. Each webinar inside ...How to build webinar funnels
This tutorial will give an in depth guide on how to build webinar funnels in just a few minutes. Our platform makes is super easy to build your (automated or live) webinar funnel in just a few minutes! But there are also a ton of powerful ...